Take a 6"x12" piece of card stock - I used Colonial White. Score it at 4 1/4" and 8 5/8".
Then, using some kind of circle cutter or anything round as a template, round off the short end of the card.
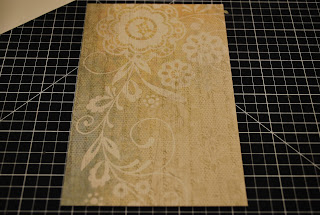
Here's the gorgeous Florentine paper I'm going to use: It's 5 1/2" x 3 1/2"
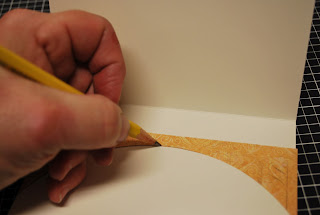
Put it under the rounded end of your card base and trace. Ouch, you can see my sore thumb and finger. I got that from attacking Cousin It with a pair of scissors. Cousin It is that overgrown Japanese Maple outside our front door, the one with the lousy haircut. (I couldn't find the trimmers!) Any of my customers who mention Cousin It to me will get a special prize. See, there are rewards for reading my blog! I put my pencil lines on the back of the paper I want to use.
Trim and attach.
Now take a 4 1/4 x 5 1/2 piece of twilight card stock and start random stamping. I always start with the largest of my stamps that I'll be using. Don't forget to go off the edges with your stamping to make it look more natural. Rotate the stamps for variety.
Now I've added the two smaller stamps. These are all from Potential. I used some 2nd generation stamping also. It's bothering me - looks a little plain.
So, I'm adding a stamped image in cocoa. This stamp is from the Florentine Workshop on the Go Stamp Set. You will notice the cocoa images are rather light. I think that stamp pad is my original from 5 years ago - you can imagine how much use it has gotten through the years in all my classes; it's getting a little tired. But, the look is perfect for the effect I wanted: I love it!
Now for some of our very cool chocolate striped ribbon:
It's getting beautiful!
There's that same cocoa image from Florentine on the right. The Happy Birthday stamp is from the new stamp set: 4 My Friend.
Now I've added a medalion type image, cut from my Cricut Art Philosophy cartridge (both the circle and the scallop behind it are AP images). The scallop is from Brown Bag card stock. The stamp is also from Potential. You can get Potential only during the month of March for $17.95 OR get it for $5 with a $50 order.
I inked all papers with Brown Bag ink and Twilight ink. Brown Bag and Twilight look really nice together. I also added a bitty antique copper brad to the center of the medalion
Here are the three inks and the three stamp sets I used.


No comments:
Post a Comment